Tuesday, February 7, 2012

An Enless Supply of Flooring Stories

Looking over 2011, I only made one entry for the entire year. Considering how the year went, that's not a big surprise, but I have a lot to say, so I hope 2012 is the year of more writing.

To start the year off, I have been finishing up projects that I had started when I worked in Seattle, but could never find the time to complete. For a person like me, stacks of hardwood flooring and unused lumber that haven't been made into what I bought them for is depressing.

I guess I should say that it started a little before the end of 2011 to be exact. We moved all of the furniture out of our master bedroom and into the living room, but my grandmother passed away a day later. Since I co-signed on her condo, I was now the defacto owner and had to clean out all of her belongings, make repairs and find a renter before working on my home projects. So we lived in our living room for a month, but it is done now.

This is our bedroom closet:


This is our Master Bedroom with the finished floors:

The flooring in the bedrooms is a prefinished Birch hardwood, 3/4" thickness with 3&1/4" width. The grain on birch is much more intricate than Oak, which is the standard hard wood for flooring.

We waited until the holidays were over before starting the next room, the family room, which is on the opposite side of the house. This gave me time to find a great deal on a used flooring nailer. Up to this point I had been using my standard 16 gauge finish nailer. A standard finish nailer will secure the floors, but the straight, un-barbed nails are more likely to allow movement which generates sqeaking. Flooring nails are barbed with a big L top, and the flooring nailer attaches them with more than 11lbs of force, where my standard finish nailer generated a little over 3lbs of force. I avoided getting a flooring nailer for a long time because of the cost, but if I could go back and do it over, I would reconsider.

Lucky for me, the used flooring nailer cost me half the price of a new one and works just as well (air tools are awesome because they never wear out). The flooring on the other hand, I had purchased in the spring of 2011, I was just too busy to install it. The family room flooring is a 1/2" oak with a cherry stain. I didn't notice any significant difference installing the 1/2" instead of the 3/4" but theoretically it has probably shaved two or three decades of life expectancy off of the floors (oh darn). I don't think we'll be in this house, or possibly even alive by the time that becomes a problem, so I won't let it bother me.

This is a picture of the bar area adjacent to the family room just after I had finished installing new linoleum tiles the week that Coughlin was born:

Those tiles looked very nice for about a year and a half, but started peeling up shortly after that. I had re-attached many with ahesive, but always knew that they were a short-term solution. I had more than enough hardwood to include the bar area, so there was no question about it. I had to tear up an added layer of particle board to get to the sub floor, but that just made the removal of the linoleum easier.

I would only recommend using linoleum tiles if you are attaching them as a layer over an existing vinyl floor since (even though they are supposedly designed for this) they don't stay attached to primed particle board at all.

Here is the re-re-finished bar area flooring with the new hardwood:


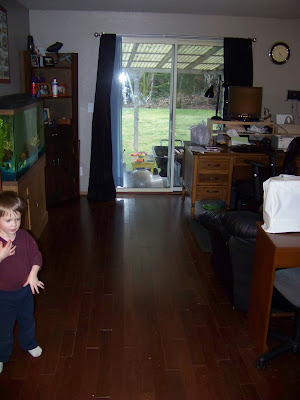
I've been juggling a lot of projects and events, so I didn't get any pictures of this room before we moved back into it, but here is the finished family room with our stuff in it:

The only room left that needs hardwood is now the living room and dining area, which will require about 550 square feet of flooring to finish. All I have to do is find a deal on some pre-finished hardwood that I like and I will be finished with this nasty old carpet for good.

As a side note, a local flooring contractor installed new sheet vinyl in the kitchen and bathrooms for less than I would pay to buy new floors and install it myself, so once I finish the living room and our laundry room we will have new floors house-wide.

More to come I'm sure...

Wednesday, October 5, 2011

Making The Case; For Gold

Last night I had a dream that Ron Paul's campaign manager called me up to see if I would host a small gathering for Congressman Paul to talk to voters about his positions and reasoning. I said yes and within minutes he was at my door with a group of people he wanted to converse with. They asked me to act as secretary for the meeting, where I went through the list of topics they brought (essentially to argue about). After they were done Dr. Paul came over and put his arm on my shoulder to thank me, at that point I realized he was somewhere around 6'8" tall. These things were funny to me because he never struck me as affectionate towards strangers and I was pretty sure that he was not that tall on TV and videos.

Well, a friend recently loaned me "The Case for Gold" by Dr. Paul  which I will start reading after I finish my current book. Before I read it I wanted to take a chance to document my overal feelings to see how my view of the gold standard may change.

I've always been a critic of our monetary system, but I've never been a large proponent of the gold standard as a solution, but thought it might be better than no standard at all. In my opinion, a monetary system has to be based on something tangible to be worth anything, but I've always said that it doesn't matter if it's based on precious metals or lima beans, since what really matters is who controls the supply and how you control them. Since the entire basis of paper money in our society is a means for the government to issue compensation for services without providing anything tangible in exchange (a government shouldn't own anything to give since it all belongs to the people), I've always supported currency minted and controlled directly by the government. Since we elect the individuals who control it, I've always believed this to be the best means for control and mitigation of corruption.

Many argue that corruption among elected officials is rampant and that we shouldn't trust them with this kind of authority. I agree that the corruption is rampant, but as far as I can see, they always have had and always will have authority over those systems, so I would like to pursue the system which at least gives us the best opportunity to see what they are doing and elect someone new. I have read some studies which indicate that gold stockpiles are controlled primarily by non-government entities, which seems like a reduction of control. On the other hand, however, I believe Dr. Paul may be advocating a system in which money is minted directly and the value is set as a backbone of something tangible. I'm not completely certain that this offers us more benefit than risk, but I'm open to consideration.

Here are some principle beliefs I already have regarding the financial system:
1. The Federal Reserve was only created to act as an executive credit card that could bypass a notoriously stingy congress.
2. Paying interest to the Federal Reserve as a private institution is pointless since we could do everything they do, but without the added cost of interest and with the added benefit of running it with elected officials.
3. The fractional reserve banking system is completely unfair and only makes higher profit for banks at the expense of greater, impractical debts for the people.
4. Attempting to control inflation with interest rates does not work.
5. Money is a representation of debt, in this case, money should circulate because the government prints it to pay for goods and services rendered. It is removed from circulation by taxes. This works kind of like an investment, where the money paid is reused exponential times so that when it is collected again through a tax, it should have served numerous people with beneficial exchanges before being collected as a tax. That being the case, even a high tax rate (which shouldn't be necessary in a balanced system) should reflect an equally high output of products.
6. In order to use government minted money as currency, it needs to be readily available to everyone. This means that annual spending (investment) should be very high, but that they should also succesfully balance debts using short terms. Instead of a system of unmitigated and substantial debt growth, it should be a system of frequent monetary rotation, but with controlled thought regarding our next moves.

Overall, I don't expect the book to change many of those views, but suspect it may offer suggestions for enhancing and governing them. I may not be the biggest proponent of the gold standard, but it is something I probably wouldn't oppose as an improvement. The current system seems to make everyone throw their hands up as if there is nothing we can do about it.

Monday, December 20, 2010

Step 2: Getting Rid of Dangerous Trees and The Ongoing Quest for Firewood

If you read a post of mine from earlier this year called "The Big Move" you would have read a story of toil and despair about how I moved a shed from one side of my yard to the other so that I could make way for a new shed to use for firewood storage. This is a short continuation of the overall project which "The Big Move"was pivotal in completing. This weekend, while all you normal people were resting at home, out at church or making the last dash for holiday shopping before the big day, I was happily ending the lives of 20 maple trees in my backyard.

As I mentioned before, this all started with my desire to build a wood shed in a specific, out of the way spot in my yard. After removing the existing shed, I decided to wait for winter so that I could cut down the corkscrewed and slanted maple trees which were growing over that area. Not only did their slant and the soft soil pose an immediate threat to the shed I wish to build, but they are also choking out many young evergreen trees and within two more years, would have been tall enough to damage my house if they fell in a windstorm.

The recent weeks of unrelenting rain we went through made this a little less than an ideal day, but being eager to make headway, I thought I should take advantage of the sunshine while I still could. The trees would be wet, but not sticky with sap or heavy with leaves (though they are formidably heavy, even without).

My main chainsaw is Husqvarna 51 that my dad recently gave to me, I only asked to borrow it, but he hasn't cut down any trees in years, so he just gave it to me instead. I went out to buy a new chain for it and got a carry case while I was out (if you ever transport a chainsaw, you'll know that keeping the mess off your truck's upholstery is a serious chore). The case was for a Stihl, but cost half what the Husqvarna case would cost, so I guess plastic is just expensive in Sweden. The saw has a 51cc engine which is powerful for it's size and a 20" bar and chain. My secondary chainsaw is a Poulan Pro 260 which has a 40cc engine and an 18" bar and chain.

I used the Husqvarna 51 to cut all the trees down, and the Poulan to do most of the limbing and bucking once the trees were on the ground. There are a lot more opportunities to get your chain stuck while taking off limbs and the Poulan is just not strong enough to go through a tree of considerable size, where the Husqvarna slices through trees feel like I'm carving turkey, with a lot more sawdust.

The two most dangerous problems you will generally run into when felling a tree are when the tree doesn't finish falling, such as when it's caught on something (usually other trees) or when the tree falls or starts to fall in the wrong direction. In the 20 trees I cut down, I couldn't help but run into these problems at least a couple of times.

In my opinion, the more immediately dangerous of the two problems is usually the tree falling in the wrong direction, specifically when there is something in one direction that you don't want to inadvertently destroy. In my case, however, I positioned the notch so that if the tree did fall the wrong way, it would land in a clear area without hitting the house.

Everyone is probably fairly familiar with the principals of felling a tree. You look at the variables which will make a tree fall in a particular direction (hopefully that is the direction you want, or at least a directly that will work), then you notch the tree on that side going far enough through to encourage the tree to fall to one side, but not far enough to cause the weight of the tree to pinch your bar and trap your chainsaw inside. Once you have made the notch by making two angled cuts, you then cut through the opposite (back) side until the tree begins to fall. This makes the tree fall away from you and your chainsaw. 

In the case of this tree, it didn't have any apparent lean at all, but split into three large trunks half way up, so it was especially heavy at the top (a classic characteristic of many maple trees). I did have some difficulty making the notch on this tree since it was on a steep hill, but I guess that the notch I made was just not big enough to convince the tree to fall down the hill towards my creek. When I cut almost half way through the tree, it began to lean very slightly to the rear, not enough to trap my chainsaw, but enough that I could see it wanted to fall in the other direction.

These are the moments which take some critical thinking. If I continued cutting, it would almost definitely trap my chainsaw, adding a thrilling element of added danger to the already complicated situation. If I tried to cut through the back without using a notch, or tried to make a new notch on the back side using my first cut, I would also be likely to pinch my bar, trapping the chainsaw. In both scenarios, there was no way to guarantee that the tree would fall in the right direction anyway, since it was only just barely leaning backwards from my first cut. A tree trunk spinning and falling in any direction would be very dangerous.

I decided that the tree was still strong enough that I could make a new notch on the "back" of the tree, about 18" up the trunk from my first cut. Then I could cut through from behind and get the tree to fall toward the house. This could have been done lower than my first attempt as well, but I felt like there would be less pressure above my first cut and therefore less of a chance at pinching my bar and it would lower the chance that the pressure from the falling tree would be just enough to break apart what was left of my first cut, sending chunks of wood in all directions. The operating principal in that assumption was that it would be falling off of my first cut instead of with it (this assumption was correct). The tree came to the ground with ease and is now resting in a location which actually makes it easier to limb.

The main reason that I feel as though this type of problem is considerably less dangerous (though still dangerous enough) than a tree which is caught on other trees is that, if you catch it soon enough, falling backwards is much easier to control or correct since the variable forces are limited. If I really wanted to, I could have strung up my 2-ton puller and pulled the tree in the direction I wanted it to go, and I could have done so easily and with plenty of time while the tree stood strong.

I ran into the other problem three times, but was able to solve them all with relative certainty. In the case of my first stuck tree, it was about a 13" tree which became caught in the tops of some nearby, younger trees, which kept the cut trunk resting on the stump at an angle. I first tried to winch this off, using the trunk of a larger tree I had cut down a few minutes before. The winch came close to freeing the top of the tree, but I just couldn't get it far enough to pull the tree down. In my next attempt I made a new cut in the stump, leaving a little more space for the trunk to fall. This caused the trunk to fall off the stump, but was not enough momentum to free the tangled tops. Now having the base of the trunk touching the ground, I had a better angle, so I made a new notch in the top side of the trunk and cut upward from the bottom a little, then went back to the notched top and cut the rest of the way through. The base fell away and the tree finally came lose and landed on the ground.

The danger in that type of situation is that so many variables could bring the tree down and the addition of a spin or roll caused by the branches could land the tree just about anywhere. A strong wind or surrounding branches finally giving way could cause the tree to come down at any moment.

Luckily, the other two "stuck" trees I ran into were much easier to fix, both were falling down my ravine, and when they got stuck, they were at such an angle that they were already almost to the ground. In both cases the tops simply got caught in the branches of the millions of other maple trees on my property. One of them was just barely pinned to the stump it was cut from, so I used a sledge to smash the end off. Since I never had to enter the path of the falling tree, I'd call that one the safest.

The other one, however, was part of a cluster of tree trunks that grew out of the same root system, Since it was on the outside and I only had one more trunk to cut in that cluster, I decided to let the weight of the last falling tree push it down the rest of the way. I notched the next trunk in the right direction, made the cut and backed away as one tree knocked the other down like a bowling pin. Another case where careful thinking allowed me to make everything safe again, without putting myself in the path of any serious danger.

Aside from those adventures, the rest of the trees went down quickly and smoothly, landing exactly where I wanted them and without any problems. Some of the trees were as small as six inches, and a few were as big as about eighteen, but the average tree was about nine to ten inches in diameter. You would think that taking out so many like this would have a huge impact in my backyard, but when you look at the first picture, you'll see that I would have to clear about 100 small maples before there was a major difference.

This picture shows where nine of the 20 trees fell, directly into my backyard.


This pictures shows how close the very tops were to being tall enough to hit the house. As I mentioned before, in just two more years they would have hit the house when they came down.


This is a picture of the large tree which decided to fall back towards the house.


Here is a limb which broke under it's own weight from the force of the fall down into my ravine.
 You can't see the depth in this picture, but the trunk of that tree is about 15' below the stump I took the picture from.


This is the pair of trees in which I used one to knock the other down since it didn't fall all the way.
 This is the base of the same tree, if you look closely at the moss you can see water droplets pouring off. The ground was so wet that this stump was pouring out water.


This is another large limb which broke under it's own weight when it crashed down into my ravine. I'll get lots of good firewood out of this one, I just have to figure out an easy way to get it all back up the hill.

I have a few more maple trees that I would like to take out on my property, but since I took care of the ones which posed any type of danger to my house or shed, I don't think I'll be taking down quite as many at one time in the near future.

One of my secondary goals in thinning the trees was to make room and give light to the young evergreen saplings which are struggling to grow under the thick canopy. This should give them some space for now, most of my future felling will revolve around even more space for them, but this will be enough for now.

Thursday, August 26, 2010

A Good Price for Wood Floors

Because I can't sit still for more than a few minutes at a time, I've been working on installing hardwood floors in our Bedrooms. It all started a few weeks ago when I found a Craigslist ad for pre-finished birch hardwood for $2/square foot. Since our carpets are the original carpets for our 1989 home, and the original owners smoked a lot, I have been waiting a long time for this day to come.

The flooring outlet place we bought the wood from in West Bremerton had just about 500 square feet, which should be enough to do all three bedrooms and the hallway between them. Since I already had an air compressor, along with many other tools, all I needed was a finishing nailer and a lot of nails.

We started with Coughlin's room, which was in the worst shape since someone who stayed with us previously had some not-so potty trained dogs. Brandy removed the carpet, pad and tack strips and I pulled up most of the staples (they used an inordinate amount) and took out the trim as well as the closet doors.

Here are a couple of pictures showing the subflooring. Luckily, even though our home was built in the late 80's, we have solid plywood floors. I think it's 5/8th", but haven't done any drilling through to check. It doesn't sag and it's very solid, I am glad about this because it was a popular trend at the time to put in particle board, which is horrible.


All of the small yellow spongy looking spots represent a staple for the pad, they went really overboard.

After everything was removed, we put down 15lb asphalt paper (for roofing) to provide a moisture barrier and to improve the insulation, even if only slightly. I used my staple gun to attach the pieces that I rolled out and cut with about a 6" overlap.

Next we put in the floor, some sites and how-to books say to use a flooring stapler, but those are expensive (even to rent) and so big that you can only use them on about half the job, since they don't fit in the small spaces. The device itself is about 12x12 total with a mallet activated button on the top which you have to hit to drive the staples. After reading up on it, I decided that a simple finishing nailer would be better for me, it fits into fairly tight spaces if you get creative, and with three or four nails per board, I haven't noticed any signs of looseness.

The first room I finished was Coughlin's, he stayed in our guest bedroom for a couple weeks while we finished his room up.

Here is his finished room looking in the door (you can see Kitty Cow enjoying the new floors).


This is the closet side of the room finished.


And this is the other side of his room.


The next room to work on was the hallway, since all three rooms and the hall will be connecting, I have to go from one job to the next, maintaining contact the whole time. Even if I measured out the spaces perfectly in advance, there would be no way to get the wood to match up as nicely as I have by going from one room to the next without breaking the connection.

The hallway required a lot of small detail work, so it took just about the same amount of time as Coughlin's bedroom. I had to remove the trim on our three bedroom doors, one bathroom door and had to take out entirely the door for the hallway linen closet.

This picture shows one of the heavily detail oriented corners of the hallway, the door to Coughlin's room and the bathroom being just a few inches apart. I had to trim the flooring and the door trim very carefully. You can see the very small gap between the door-frames and the floor where you can see a bit of black tar paper. Those gaps look big in this zoomed in picture, but from a stand in normal light you can't see them at all.


The small 1" trim pieces that go in the corner were pretty beat up, but they are hardly noticeable with normal lighting so I decided to keep them anyway, it was easier than finding and cutting new trim, especially since it wouldn't match.

Here is the view looking into our bedroom. You can see our nasty old carpet with the exposed pad below. It will be coming out soon as part of this project, so we didn't put any effort into making it look nice for the time being.


On the left you can see the edge going into the bathroom. I had to make careful measurements and cuts to get all the pieces to line up perfectly. I will probably get a small wood reducer strip to cover the threshold there, so the wood must be perfectly flush.

This is the view into Coughlin's room from our room. You can see the hallway closet to the left of Coughlin's door.


Here is the view from the living room into the hallway. We still have to work on the guest bedroom on the left.


I turned the last piece sideways so that the floor was held in tighter and it gives me a dividing point where I can change to a different color, stain, size or grain in the living room, since I don't have enough of this birch to do more than our three bedrooms and the hallway.

Hopefully I can find a deal as good as this for the rest of the house so I can do the living room and family room for a low cost.

Sunday, August 15, 2010

Waste Consuming Reproduction Factories

In other words, I got four hens a few weeks ago.

Peter and Karen had raised these four hens from chicks at their home in Miller Bay Estates, not knowing that their homeowner's association covenant did not allow any livestock of any sort, no matter how small.

They didn't want to risk selling them to someone who would turn them into meat and they also wanted to be sure that the four girls could stay together; Knowing that I had intentions of turning half of my garden shed (the one I talked about in "The Big Move" no less) into a coop and creating a large pen in an otherwise unusable part of my yard, I came to mind right away.

I went over a few weeks ago and helped them take down their temporary coop, both hauling it away for them and scoring some free lumber and wire with which I could construct my own.

Since I have a few things to do before I can build their new coop and pen area, I made a temporary coop of my own using a combination of scrap lumber which I already had and the parts I took away from Peter and Karen. In the end I only threw away a few unusable pieces of lumber and wire from their original temporary coop.

I made a basic lumber frame out of 4x4's which used to be fence posts that were part of the fence which was falling over at the end of my garden and 2x4's from the fence which used to be falling over in my front yard.

Being a tall person I was concerned about standing room, so I went with a simple lean-to design which gives me enough head room to stand and keeps rain from collecting on the roof.

Here is the finished product.


They were using an igloo doghouse as the nestbox, and instead of building a custom nest box, I went for the quick solution of moving forward with the doghouse. The only alteration I made was building a short base for it to rest on, giving the chickens more ground room and making it easier to get eggs since it is at a higher level. I have some more lumber which I may use to build a more appropriate nest box, but whether or not I do that depends on how soon winter comes and if I will be able to finish their new coop instead. For now, the doghouse is a great summer home, as bulky as it is.

The odd angled boards which seem out of place in the foreground are roosts, which the hens love.

I made a ramp which they can use to get up to the nestbox, but they usually bypass the ramp and hop directly in.


In addition to the ramp, you can see that I made another small stand for their water dish. With chickens, anything that is on the ground is fair game for roosting, so their water was getting knocked over or filled with dirt daily. Now that I raised it up to head level for them, they don't knock it over or get mud in it anymore. One of their favorite places to take dirt baths is right below the stand.

Another item I made out of scrap lumber was a small feeder, which you can see below the ramp (it stays extra dry down there).


It's pretty easy to build these, I used scrap 2x6's to build the box, and though it's hard to see in this picture, I bent some old wire fencing over the top in an A form so that they have 4x2" slots to eat from. This keeps them from walking in the food or standing on the feeder. It also prevents them from fighting over the food, it is hard to explain but if you watch chickens eat they are constantly nabbing whatever they can right out of the mouths of their friends, and when they are trying to chase each other away from whatever they've found, they do so by pecking at each other in the same fashion.

They all came with names, in this picture the one looking at the camera in the back is Sadie, and the one pecking the ground is Macie. Sadie is a little bit bald on her head.


In this picture Sadie is again in the back, the closest chicken is Malalie and the one with a little more red around it's neck on the left is Sophie.... I think... We have a hard time telling the two apart.


Here you have Sophie in the foreground, Malalie just behind her and in the far back, partially blocked by the roost is Macie. Sadie is the one showing her butt to the camera.


They produce 3 to 4 eggs per day on average, some days they only leave us 1 and sometimes one of them doubles up and they make 5.

The coop is where they spend most of their time, but they get to come out at least once a day, we let them roam the yard freely with supervision (they love the garden, but we aren't done growing vegetables yet this year). They mostly hang around the fence and the shed, digging in the plants to find slugs and insects. If one of them finds a slug, they usually run across the yard at full speed to try keeping it for themselves, but the others chase them down and it's mayhem until one of them finally eats it.

Coughlin absolutely loves the chickens, even though he was afraid of them the first day. It only took him a few hours to start mimicking their clucking. When he wants to go see them now (which is several times a day) he grabs our pants and pulls while saying "bock, bock, bock" in a deep, scratchy voice. He will make a sound which is also very close to the word "chicken" now, but he will only say it after a lot of coaching.

Every night after work Coughlin and I go out together to pull up dandelions from the yard or weeds from the garden to feed to the chickens. Dandelion leaves are one of their favorite foods (aside from slug of course). It's mostly an excuse to work on weeding the lawn, but I pull a bucket full of dandelions out of the ground and dump them into the coop nightly and by the next morning there is usually no trace left of the large pile of greens. They consume the dandelions completely, tearing off every leaf first, then the stems and eventually the roots.

I usually set aside a handful for Coughlin and I to feed to the chickens ourselves. He brings one of his small chairs from the porch (with much grunting) and sits in front of the wire while I hold dandelions leaves and let the hens tear them up. Coughlin will occasionally hold out one or two per night, but the chickens grab it so quickly that it startles him (which he laughs about) so he prefers to drop them through the chicken wire instead. When we run out, he usually grabs strands of grass to feed them until I tell him that it's time to go in and say goodbye to the chickens. He waves his hand and says "buh" to them, turning around and repeating the process several times before we get to the porch.

The chickens eat about as much feed as Abby does in a day, but their feed is much cheaper. We feed them a mix of chicken feed pellets and scratch grains, which are cracked grains of wheat, corn, rye, etc. A 50lb bag of feed is about $14 and a 50lb bag of scratch grains is about $10. We also mix in some crushed oyster shell and grit every once in a while, the oyster shell providing enough calcium to produce egg shells and the grit being for digestion. Those two supplements are not completely necessary for us since our chickens are out often enough to forage for what they need or want. They are made mostly for chickens living in more confined spaces on an egg farm or otherwise.

Ultimately, I'll have a pen for them which borders the garden, which will also be fenced, and during the fall and winter I will let them keep my garden weed free and fertilized for me, while during the spring and summer they can eat blackberry bushes and stinging nettles which cover my hillside.

It's a pretty good trade in my opinion. I give the chickens all of the stuff I don't want and they turn it into eggs which I do want.

Saturday, July 3, 2010

Poncho


Our sweet, precious Chihuahua, Poncho, died last night.

On Friday morning I awoke to find Poncho on his back, attempting to roll himself over without success. He was very stiff and cold, and he was unable to move his neck. I rolled him over and checked his eyelids, which were clear (no nictating membrane). He was very conscious and present, eyes tracking well, responding to touches and interaction, but unable to move.

I massaged him for a few minutes to loosen up his legs and checked his heartbeat which was weak and irregular, but his breathing was fairly consistent. Brandy made an appointment with the vet and I moved him to a bed in the living room, on top of a heating pad to keep his temperature up and help relax his muscles. He rested easily but was still responsive when given attention.

I suspected that this was either some type of inadvertent poisoning, or severe arthritis since he was showing signs of cognizance. Poncho became less responsive as the morning went on and when Brandy took him to the vet, they confirmed our fear that it was a poisoning and that there was not anything which could be done. They considered a feeding tube to force a charcoal slurry, but they didn't have any tubes which were small enough for Poncho, and they were worried about potential damage from doing so.

The only options were euthanasia or waiting. Since he did not seem to be enduring incredible pain or suffering, Brandy brought him home. Neither of us will use euthanasia except as a last resort, because there is a large difference between an animal dying and determining that an animal will die and killing it. Given his age and his recent weight loss, I didn't think Poncho had much of a chance, but I wasn't willing to personally reduce that chance to nothing.

When he got home, though he was less cognizant, he was more relaxed and his vital signs became slightly stronger. He did have a couple of short seizures and a bout or two of panting, but otherwise he was fairly quiet and mostly slept.

When I got home at about 9:00pm he was howling softly, not sounding as if in pain, but softly, very similar to his singing which many of you are familiar with. I sat by him and pet him as I diagnosed this problem and decided that it was not an intentional noise, but due to his troubled breathing. I turned him over to see if he could breath better on the other side and his breathing became less strenuous and he stopped howling.

Coughlin thought that it was hilarious when Poncho barked or howled. Coughlin was tired, and also excited to see me so he was being fairly noisy. I decided to move Poncho into a comfortable bed in the garage for the night since it was mutually beneficial. Coughlin would fall asleep, without the chance of interruption and Poncho could enjoy some rest in darkness and silence (reading up on dog poisoning today reminded me that bright and loud environments induce seizures). It was a good thing that I did, because Coughlin became much louder after he first fell asleep because he woke up vomiting, coming down with a stomach flu that Brandy just recovered from.

I laid Poncho in his bed and covered the kennel partially in a blanket to reduce any noise or lights and told Poncho that we loved him dearly, but that if he could not make it, to leave us.

After starting a load of laundry and cleaning up a couple of vomitings, I had a long internal debate as to whether I should check on Poncho before going to bed. It was a matter of deciding whether I would lose more sleep knowing his condition (still fighting or at permanent rest) or not knowing. Since I had first put him out there, I had felt fairly depressed, up until about ten minutes prior to my internal debate about checking on him, at which point I felt suddenly relieved at the strong sensation that he was no longer living. Which goes to say that the real internal debate was not whether I would check on him or not (because I knew that I would have to) but whether it would bother me more to find him still fighting or deceased.

I opened the door and turned on the light to find him in the same comfortable position with his eyes open, staring into space. I have always wondered at the fact that most bodies have open eyelids. They say it is because your eyelids are relaxed when in their open state, but I like to think that they must see something the living aren't able to comprehend.

I checked for his pulse and breathing and left him there for the morning. To answer my internal debate, I slept well knowing that he was finally gone. It's funny the kind if impact such a small creature can have on your life, compared to our life-span, we know them for such short times, but they teach us so much about love, loyalty and compassion.

I buried him today, below a young cedar tree, and I spread wildflower seeds over his grave.

Instead of offering condolences , if you knew Poncho, post a story of your favorite memory; for those who don't have a story to share, no need for apologies, everyone knows what it is like to lose an animal and we appreciate your thoughts of kindness.

Monday, April 12, 2010

Goodbye Old Friend

Sunday morning someone finally purchased my 2000 Suzuki Bandit GSF600S. They were only the second person to come look at it, even though I've been listing it off and on for several months. I took a break from listing during the winter months since I didn't want anyone to come out and take a test ride in the rain (leaving me to clean it up again) and because not many people are in the market at that time, but this is a great demonstration of the fact that people are still not buying many toys with their money. I've sold a lot of motorcycles in the past and it has never taken me more than a week to make a deal with a buyer.

Before the interested buyer came out, I pulled the motorcycle out and started it up for a bit. It was nice outside so I took it for a ride to make sure it was sufficiently warmed up and the battery was charged enough for them to take a pleasant test ride. I'm going to miss the way that the Bandit handled, taking it out for the last ride reminded me how smooth and zippy the engine was when it was wound up to 9000 rpm.

The V-Star is certainly no comparison in that department, but it's considerably more comfortable, so it works much better for the distance trips and pleasure cruising I do more frequently these days.

I'll miss this motorcycle occasionally, but I'm glad to have yet another thing off of my very full to-do list.


Another person came by Sunday afternoon to look at the F-150. He was interested, but wants to tow a 3500lb sailboat, which the engine and transmission can haul, but the bumper hitch cannot. He indicated that he would look into hitches and get back to me today, I'll see if that goes anywhere or not.

Amidst all of this, I managed to till in the new plot for my garden. I had to remove a lot of large rocks left by the county when they were putting in their drain field for the storm drain system. I assume they used it to drive their heavy machinery over when they were working on it, otherwise they just dumped the extra rocks they had after completing the drain. In either case it was definitely annoying to dig them all out, but at least it is something I only have to do once.

I didn't plant any seeds yet, last year I planted on the last weekend in April, and it looks as though I will do the same this year. It seems like it will be warm enough to plant now, but I'll be too busy to do it any sooner. I look forward to an expanded crop this year and taking advantage of better sunlight.